On the Reporting home, click Navigate > Design > Query Object. The Query Object Editor screen is displayed.
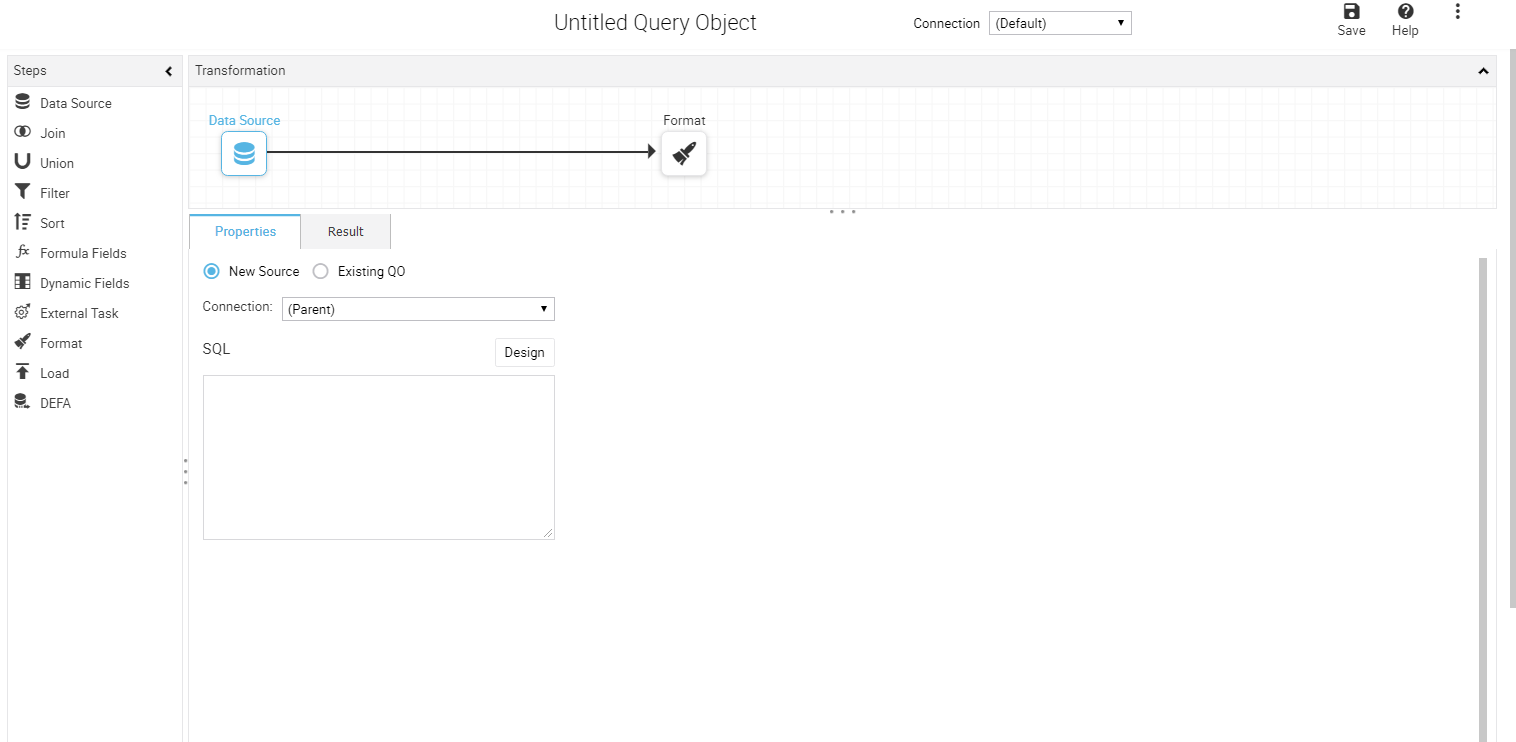
The Query Object Editor has the following sections as shown in the image above:
Steps Selector – Left pane from where you can drag and drop the required steps such as Join, Union, Format etc., to design the Query Object on the editor pane.
Editor or Transformation area – Central area that represents the design of the current Query Object. When you start designing the query object, the Data Source and Format icon are seen on the editor or transformation area by default.
Properties tab – Bottom left tab where you can edit properties of any selected item on the editor such as Data Type, Length, Locale etc.
Result tab – Bottom right tab where you can view the data result set processed up to currently selected step.
Options Menu – Top menu with action buttons (inside ellipses) for CRUD operations as stated below:
Item | Action |
Save | Saves any editing work done on the Query Object |
Help | To access help information on the query objects |
Click  | |
Add | Adds a new Query Object |
Save As | Saves the editing work in a different name |
Open | Opens a selector dialog to select and open a Query Object for editing. To open a Query Object, expand the folder and either double-click or click the Query Object name and click Open. List View shows the list of Query Objects Detailed View shows the detailed view of Query Objects list Refresh List refreshes the shown list of Query Objects fetched from the repository |
Save As | Saves the editing work in a different name |
Advanced | Refer the section Advanced Steps. |
Delete | After a confirmation prompt dialog, deletes currently opened Query Object from repository. This action is not reversible |
Add, Open, Save As, Advanced, and Delete options are inside the ellipses for better user experience.
You can do the following on the Query Object Editor screen:
Editor section is a plain canvas. To name the query object, double click on the Untitled Query Object text at the top of the screen.
When you add a new Query Object, you get the already created two steps – Data Source and Format on the editor. An edge line joins the two steps, with an arrow depicting the flow of data.
You can select a new step from the step selector and drag it on the editor and then join the step with another. Draw the joining line in the direction of dataflow. You can also double-click the step to place it on the editor.
You can also directly drop a step on an existing edge line, to insert the new step between the two existing ones joined by that line. For example, to insert a filter step between Data Source and Format, drop the Filter step on the line.
You can have multiple Data Source steps in a Query Object. Based on standard data processing rules, some steps can take multiple inputs. For example, a join step can take two inputs and a Union can take more than two inputs.
At each step you can select the Result tab to see the result data set up to selected step.
You can add a new Query Object. On the tab, click icon. Select Query Object, the Query Object Designer screen appears on which you can add the query object.

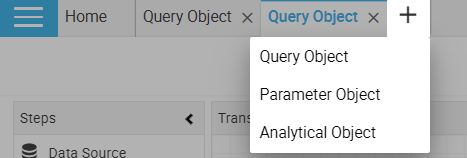
Click Query Object. The Query Object Designer screen appears on which you can design the query object.
Below is a sample query object:

Figure 2: A sample Query Object
Note: While designing query objects, reserved keywords (pre-defined) cannot be used to write SQL query or create stored procedures.