With Kyvos Reporting, administrators can create a seamless connection to Kyvos semantic models to fetch data for reporting. This connection will help users process large amounts of data and perform multi-dimensional reporting.
To create a connection, perform the following steps.
Open the Kyvos Reporting portal.
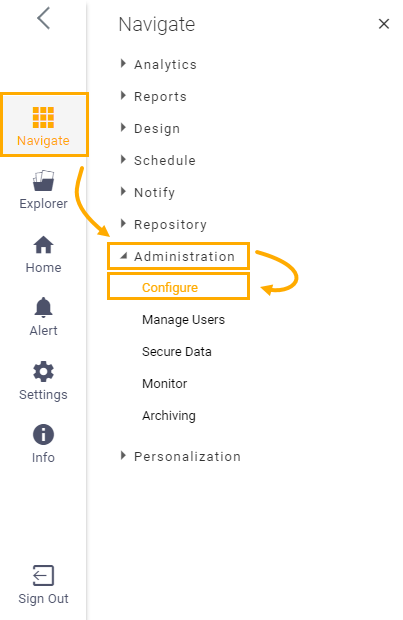
Click the hamburger icon () at the top left.
Go to Navigate > Administration > Configure.
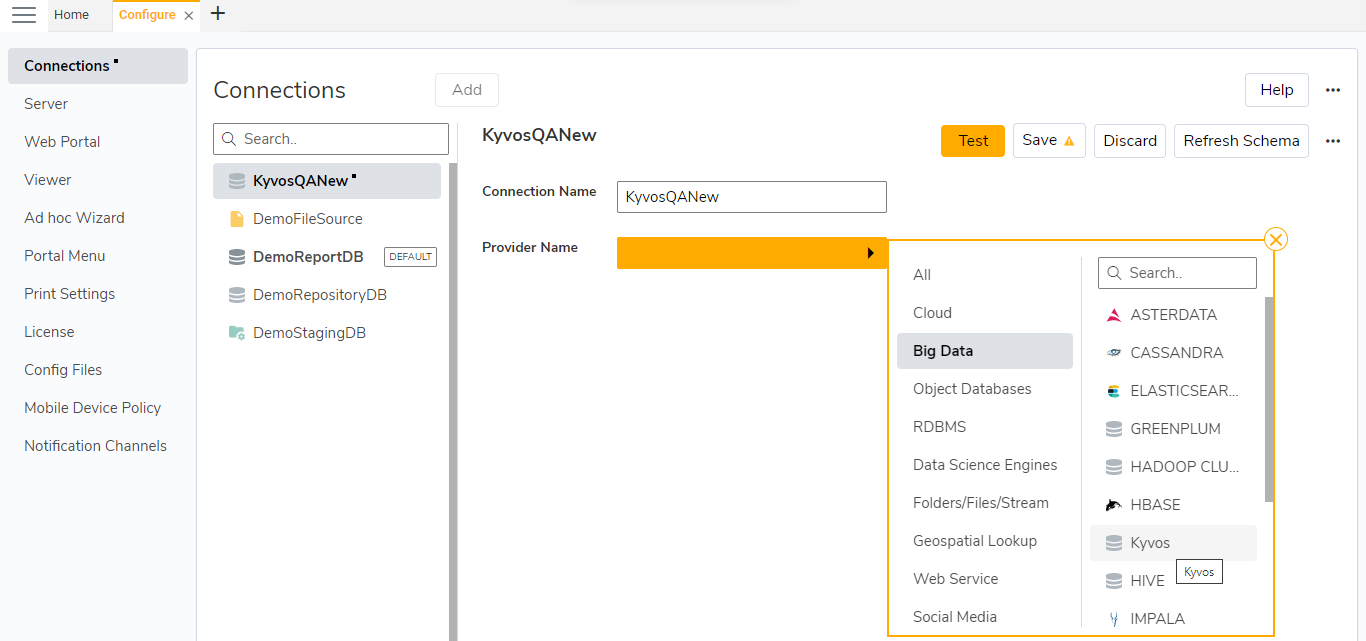
On the Configure page, select Connections. This page lists the default connections on the portal.
Click the Add button to add a connection.
Enter the details as:
Property/ FieldComments/ DescriptionConnection NameEnter a unique name for the connection.Note: Once you save the connection, you cannot update the connection name later.
Provider NameSelect the database provider name from the list.
Select Big Data > Kyvos.
Driver VersionSelect the associated driver version of the Kyvos instance.
Select Custom if you want to create a connection using custom hive jars. To upload customized drivers, refer to the Upload drivers chapter.
HostEnter the IP or name of the machine where the Kyvos server is running.PortEnter the port number at which the server is listening.ProtocolSelect the transport protocol, which is HTTP or HTTPS.HTTP PathEnter the address of the path.UsernameEnter the username associated with the account to which this connection is made.Blank PasswordSelect the checkbox if the password is not required to connect to the database.Authentication TokenBy default, this field is selected and non-editable.
Note: An authentication token is used to authenticate the requests securely.
Secure Sockets Layer (SSL) modeSelect the checkbox to enable SSL mode and ensure data transmission remains encrypted and secure.SSL Trust Store Enter the SSL trust store file reference to allow the system to access the certificates stored in the trust store for validation purposes.SSL Trust Store passwordEnter the password to access the SSL trust store file.Max RowsSpecify the maximum number of rows to be fetched from the dataset.Connection URLIt is an auto-generated connection string that connects to the database.Mask Connection StringIf the field is selected, the connection string is masked.Charset EncodingSelect UTF-8 if the database is created or started with UTF-8 encoding. Otherwise, keep it blank.Database TimezoneSelect the time zone to receive the output of date/time fields based on the time zone in which the data was entered into the database.Is DefaultSelect this checkbox to use this connection as the default data connection to fetch report data.Read OnlyBy default, the field is selected and non-editable.
Note: The selected checkbox ensures that only SQLs having read operations are executed using this connection. The write or load operation is not executed.
Pool Settings
Initial Connection(s)Specify the number of pool connections that must open initially.
The number of default initial connections is 5.
Incremental SizeSpecify the number of connections that will open when all the open connections are consumed.
The default incremental size is 5.
Resubmit TimeSpecify the waiting time in seconds before generating a re-submit request.
The default resubmit time is 30 seconds.
Max. ConnectionsSpecify the maximum number of connections that can be opened to the selected database simultaneously.
The default maximum number of connections is 30.
CacheEnable MetaData CachingBy default, the field is deselected and non-editable as it does not impact this connection.MetaData Cache Purge FrequencyBy default, the field is disabled as it does not impact this connection.
After configuring the settings, click the Test button from the top right to validate the connection settings.
If the connection is valid, click the Save button. The new connection is created.

More operations on this page
Discard: To cancel the connection.
Refresh Schema: To reload the database schema from the server.
Remove Connection: To remove the connection, click the Actions menu (…) and select Remove Connection. This option deletes and removes the connection name from the list.
Note: Before removing a connection, ensure that no objects, reports, or dashboards are dependent on it. Reloading data or refreshing the schema after removal may result in data loss.