Getting and using third party components
Intellicus supports a set of third-party libraries to extend support to the functionalities that they provide.
MYSQL database connection
You may need to create this type of database connection in Intellicus if choose to use MYSQL database server as your Intellicus repository database or report database. To be able to create this type of connection, you will need a jar made available by Sun Microsystems.
File you will need
For MYSQL 3.1: mysql-connector-java-3.1.14-bin.jar or latest.
For MYSQL 5: mysql-connector-java-5.0.7-bin.jar or latest.
Download Location
For MYSQL 3.1:
You may download the file from the following link if you are using MYSQL 3.1:
http://dev.mysql.com/downloads/connector/j/3.1.html
Download file: mysql-connector-java-3.1.14-bin.jar or latest jar (as zip or tar, depending on the OS on which it will be deployed).
Steps: Extract the above file and place the above file in folder:
<Intellicus install path>ReportEnginelibMYSQL3.1
For MYSQL 5.0:
You may download the file from the following link if you are using MYSQL 5.0:
http://dev.mysql.com/downloads/connector/j/5.0.html
Download file: mysql-connector-java-5.0.7-bin.jar or latest jar (as zip or tar, depending on the OS on which it will be deployed).
Steps: Extract the above file and place the above file in folder:
<Intellicus install path>ReportEnginelibMYSQL5.0
Note: This will come into effect after report server re-start.
Creating an ODBC type database connection in Intellicus
To create an ODBC type database connection in Intellicus:
Using ODBC Data Source Administrator, create a system data source that points the database you want to connect using Intellicus.
Create a connection in Intellicus using this database.
Creating a system DNS
System DNS is created on ODBC Data Source Administrator dialog.
To open this dialog,
Click Start > Settings > Control Panel > Administrative Tools.
Double-click ODBC Sources (ODBC).
Figure 7: Creating ODBC type Connection
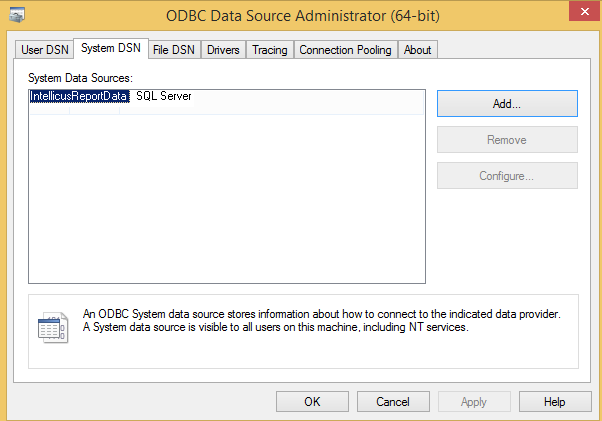
After you click Add and select the right driver, driver-specific dialogs will appear where you will need to provide driver-specific details.
After successful creation, driver’s name will appear in list of System Data Sources. That name needs to be used at the time of setting up database connection in Intellicus.
Creating a connection in Intellicus
A database connection in Intellicus is created on Databases page. To open database page, click Administration > Configure > Databases.
Figure 8: Creating a Connection

Detailed steps to create a database connection in Intellicus are provided in subsequent chapters.
Refreshing database schema
Database schema is required during:
Report design
Report run
Masking configuration
Database schema information of all the database connection configured in Intellicus is cached at:
Report server
Portal
Desktop Studio
It is automatically refreshed as per following:
Report Server: Refreshed at the time of connection creation, modification and server boot up. Information is received from respective database server.
Note: If a database connection is deleted, its schema is also deleted.
Portal / web server: At the time of server boot up. Schema is received from Report Server.
Desktop Studio: When desktop studio is launched. Information is received from Report Server.
Auto-refreshing of database schema
For the database that needs user credentials at run time, database schema is refreshed every time user credentials are passed to the database, for example while selecting such a database connection during report design, masking, running report, etc. For such connections, report server will maintain separate schema for each user credential passed.
When user opens SQL Editor from portal or Desktop Studio, portal (or Studio whatever is the case) compares timestamp of database schema refresh with that on the report server. If both matches, it means database schema cached on portal is updated. If both don’t match, schema is refreshed from report server.
On-demand refreshing of database schema
On Portal, Administration > Configure > Databases page has Refresh Schema button. Select a connection and click Refresh Schema button to update schema of the selected connection.
On Desktop Studio, Connections dialog box has Refresh Schema button. Select a connection and click Refresh Schema button to update schema of the selected connection.
When you choose to refresh schema, following happens:
Report server refreshes schema of the selected connection. After caching is complete, the same is sent to portal / Studio.
How it happens:
Caching of metadata (at report server) starts. Meanwhile, user continues to use existing metadata.
After caching is complete, existing metadata is deleted and newly refreshed data is made available to users.