When a report is run in HTML/iHTML format, the HTML Viewer appears at the top of the report. As an administrator, you can customize HTML Toolbar Viewer according to organizational needs. The toolbar has options to export, print, publish, email or upload reports.To configure the HTML Viewer toolbar settings, go to Navigate > Administration > Configure > ViewerFigure 1: HTML Viewer
Using HTML Viewer configuration page
You as a super administrator can customize (configure) HTML Viewer for:
Default: Applied when no configuration is set or System configuration is lost / deleted.
System: Applied to all the users/roles of all the organization for whom custom configuration is not setup.
Organization: Applied to all the users/roles of an organization for whom custom configuration is not setup.
Users/Roles: Applied to the user/role for which it is created.
When you open the page, System configuration is displayed. A configuration can be:
Opened, so that it can be edited.
Saved for (and so applied to) one or multiple organizations and users.
Deleted for one or multiple organizations and users.
Buttons on Configuration page
Configuration page has following buttons on it:
Figure 2: Buttons on Configuration pages

Save: To save configuration changes for System, selected organization or user (the one that is open)
Save For: To open Save Configuration dialog, select the entities and save the changes in all selected entities.
Note: Click the down arrow on Save button to get Save For option.
Open: To open Open Configuration dialog and select an entity to open its configuration information.
Delete: To delete the open configuration information (default or selected entity).
Delete For: To open Delete Configuration dialog and select the entities to delete.
Note: Click the down arrow on Delete button to get Delete For option.
Cancel: To cancel the configuration changes and return to opened / last saved status.
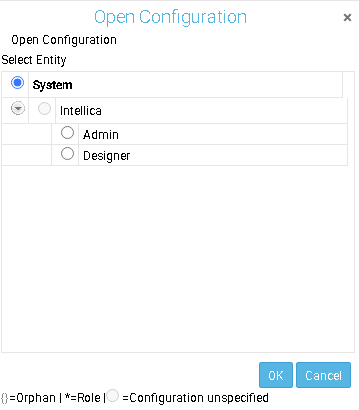
Open Configuration dialog
This dialog is used to select a configuration (System, of an organization or a user) and open it for edit on Configuration page.
Figure 3: Open Configuration dialog
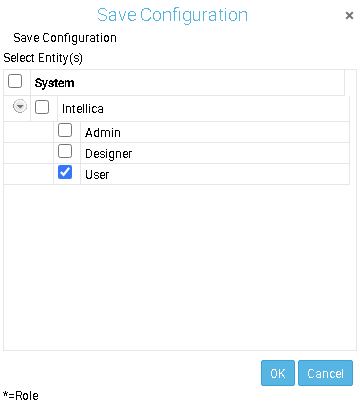
Save Configuration dialog
This dialog is used to save configuration information (set on Configuration page) for one or more entities: organizations as well as users. ‘Save Configuration’ dialog opens on clicking the Save For option.
Figure 4: Save Configuration dialog
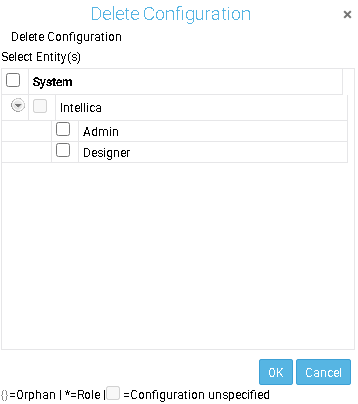
Delete Configuration dialog
You can select one or more organizations as well as users to delete configuration for. ‘Delete Configuration’ dialog opens on clicking the Delete For option
Figure 5: Delete Configuration dialog
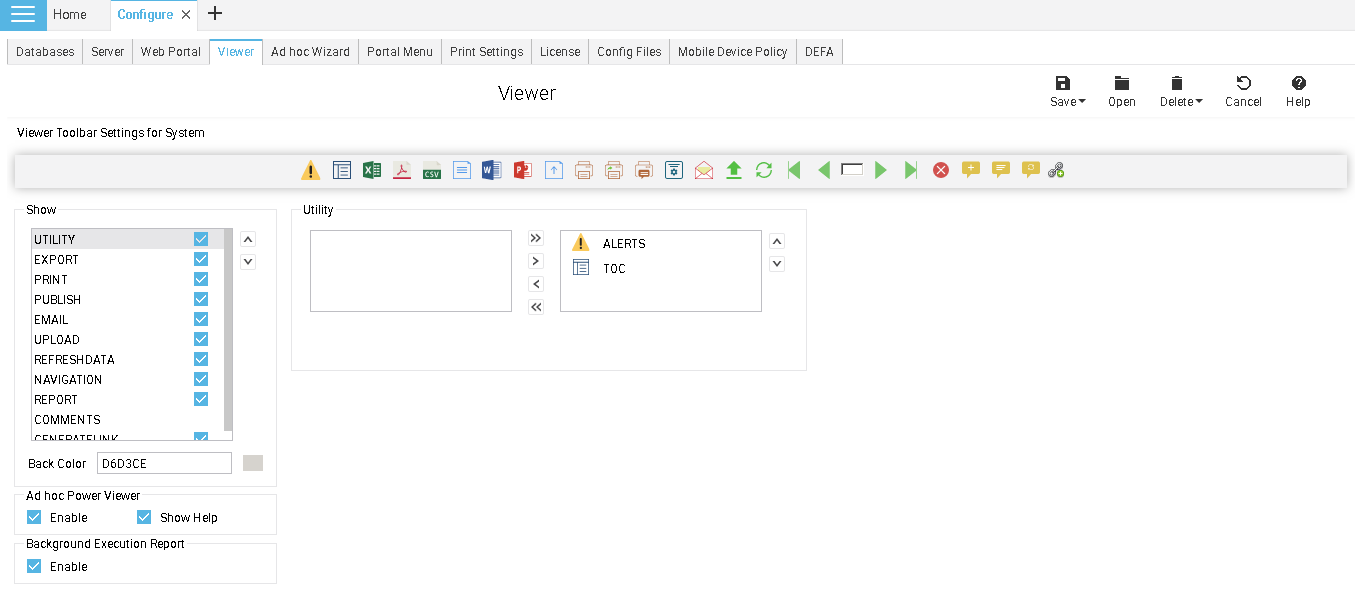
Configuring the viewer
The HTML Viewer toolbar page has these areas:
Show: To configure the toolbar group (and the buttons within the group) that should appear on viewer.
Ad hoc Power Viewer: To configure features related to Ad hoc Power Viewer.
Background Execution Report: You can choose to view or not the report execution details.
Figure 6: Configuring HTML Viewer toolbar
Show
This area contains a box where you can select the tool-button group to include on HTML toolbar.
To make tool button groups appear on HTML Viewer,
In the box within Show area, select check box in front of respective group. The information on the right of Show area would change and have information related to the tool button group selected.
Specify details, select options as per need.
Click Save button to save the changes.
To select the sequence of tool button groups on toolbar and sequence of tool buttons within the group, select respective option and use and buttons to shift it left or right on toolbar.

Backcolor: Choose the backcolor of the toolbar. Either specify RGB format code of the color or select a color from color picker. If color code provided is invalid, Intellicus will apply the default color (grey).
UTILITY
Select this checkbox to include utilities related buttons on toolbar.
Figure 7: Getting TOC button on toolbar
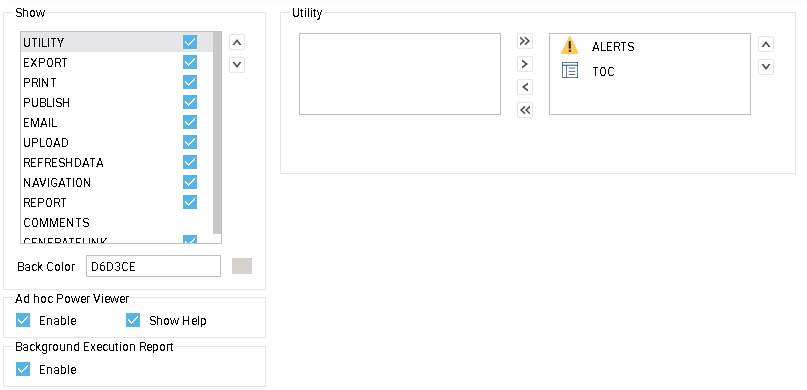
ALERTS: To get alert indicator button on viewer toolbar. This button blinks when alerts set for the report
being viewed are generated.TOC: Select this check box to include TOC button on toolbar.
In the selection box on top, choose the buttons that needs to be included on viewer toolbar (as part of utilities related tool buttons).
EXPORT
Select this check box to include export related tool buttons on the toolbar.
In the selection box on top, choose the buttons to include on the toolbar (as part of export related tool buttons).
Figure 8: Configuring Export related buttons on toolbar
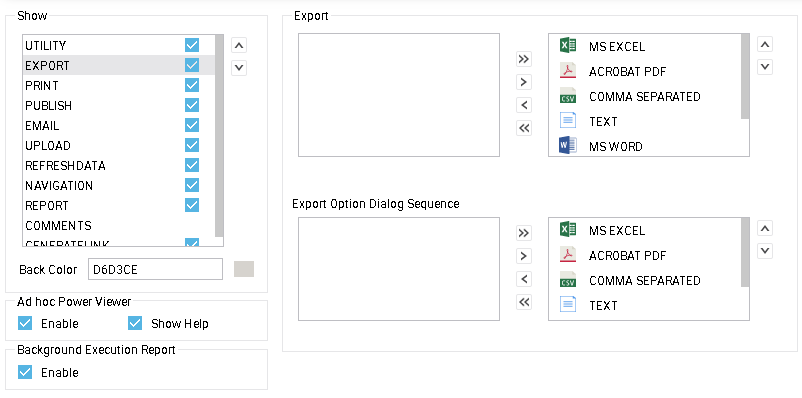
In Export Options Dialog Sequence, select the export options that should appear in export dialog box. Setting the sequence will decide the sequence of options’ appearance in the dropdown box.
Note: Export Options Dialog Sequence will be effective only when EXPORT_OPTIONS is selected in the selection box on the top.
Select this check box to include printing related tool buttons on the toolbar.
Figure 9: Print Settings and Print related tool buttons

For Print Left Margin, Print Right Margin, Print Top Margin and Print Bottom Margin specify margin (space to be kept blank) on left, right, top and bottom of the page respectively. This is specified in terms of pixels.
In the selection box, choose the buttons that user wants to include on the toolbar (as part of print related tool buttons).
PUBLISH
Select this check box to include publishing related tool buttons on the toolbar.
Figure 10: Getting button for Publish on toolbar
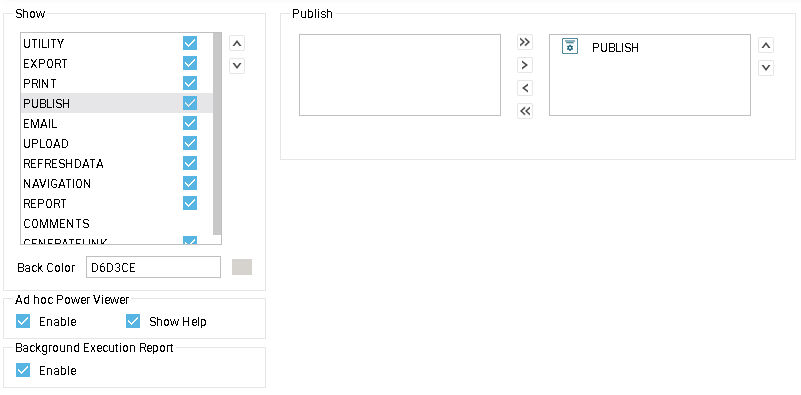
Also, from the selection box, choose the Publish tool button to be included on the toolbar.
Select this check box to include email related tool buttons on the toolbar.
Figure 11: Getting button for email on toolbar
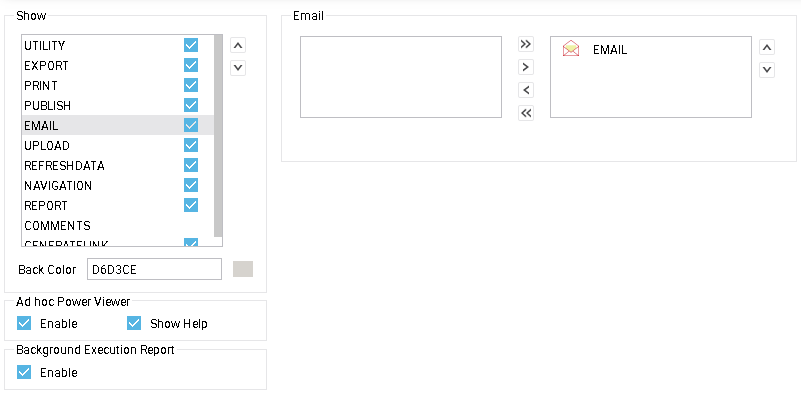
Also, from the selection box, choose the Email tool button to be included on the toolbar.
UPLOAD
Select this check box to include upload related tool buttons on the toolbar.
Figure 12: Getting button for Upload on toolbar
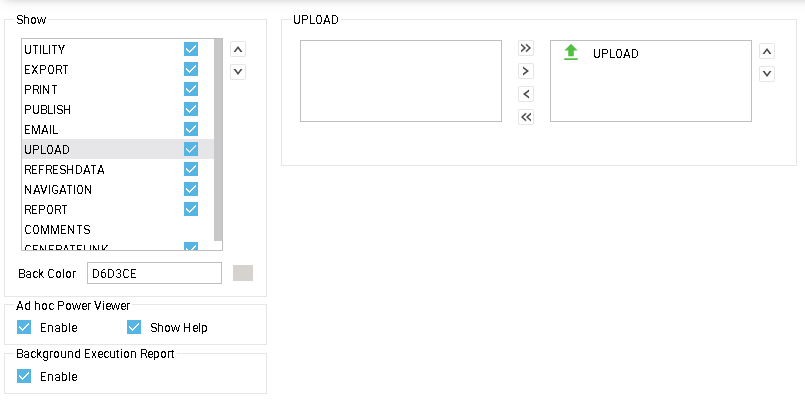
Also, from the selection box, choose the Upload tool button to be included on the toolbar.
REFRESHDATA
Select this check box to include button for refreshing report with latest data to appear on the toolbar.
Figure 13: Getting Refresh data tool button
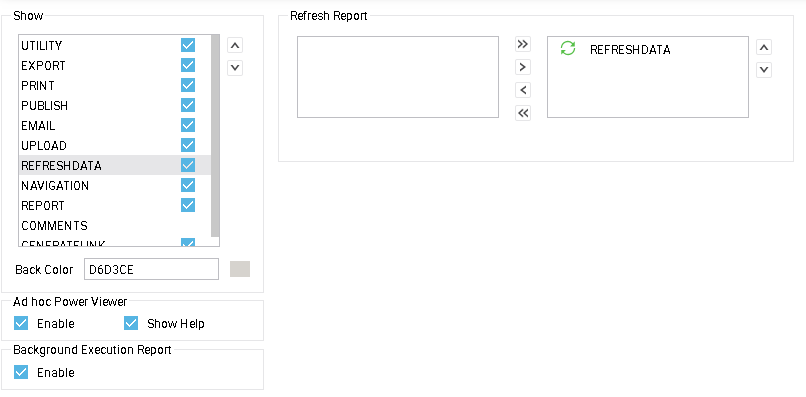
Also, from the selection box, choose the tool Refreshdata button to be included on the toolbar.
NAVIGATION
Select this check box to include navigation related tool buttons on the toolbar.
Figure 14: Configuring Navigation related tool buttons
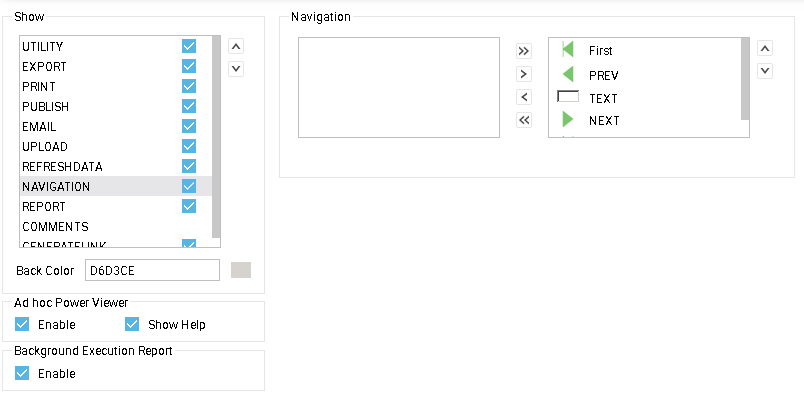
In the selection box, choose the buttons to include on the toolbar (as part of navigation tool buttons).
REPORT
Select this checkbox to include Stop button on toolbar. Users can stop report execution by clicking this button.
Figure 15: Getting Report button on toolbar
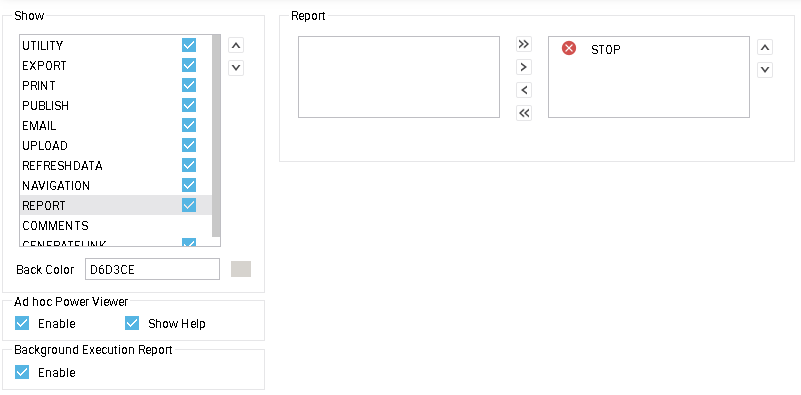
Also, from the selection box, choose the tool button to be included on the toolbar.
COMMENTS
Figure 16: Configuring Comments group on toolbar
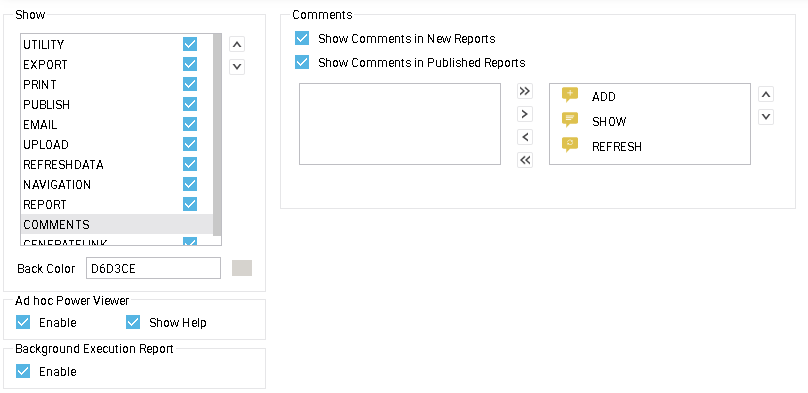
Show comments in new reports: When selected, Intellicus displays buttons in never-published reports. If a comment is added in the report, the report will be automatically published as Public and for infinite duration.
Show comments in published reports: When selected, it displays buttons while viewing a published report.
In the selection box, choose the buttons to include on the toolbar (as part of Comments related tool buttons). You can also set the sequence of the buttons.
Select GENERATELINK check box to include generate links tool buttons for published report outputs.
Ad hoc Power Viewer
When an Ad hoc Report is viewed in Viewer, you can do much more than just viewing and saving the report. While viewing a report you may want to perform sorting, grouping or repositioning columns or viewing a chart in different ways. You can perform such functions dynamically at runtime on reports if Ad hoc Power Viewer is enabled.
Figure 17: Power Viewer features
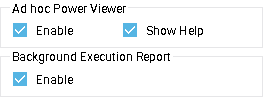
Enable
Select this checkbox to enable the power viewer functionalities on Viewer. Refer “Using Power Viewer” section to know more about Power Viewer functions.
Show Help
Select this checkbox to make the help icon visible on Viewer.